
Picture this: you’re lost in the wild, storm raging, no phone signal. Panic sets in. But what if you knew how to fight back?
Disasters strike without warning-wildfires, floods, blackouts. Red Cross stats show most don’t survive 72 hours without basics.
Master fire-building water purification, shelter, GPS-free navigation, first aid, foraging, and signaling. Ready to become unbreakable?
Essential Survival Skills Everyone Should Know
Master these 7 core survival skills-fire, water, shelter, navigation, first aid, foraging, signaling-to survive 72 hours in any wilderness using just your EDC knife, ferro rod, and paracord.
The Rule of Threes guides your priorities. You can last 3 hours without shelter in harsh weather, 3 days without water, and 3 weeks without food. Focus here first to stay alive.
SAS Survival Handbook stresses these basics in most cases. Practice them with your EDC essentials like a multi-tool or paracord. They build confidence for bug-out scenarios.
Quick skills save lives when SHTF. Start with fire for warmth, then water and shelter. Build from there to handle longer-term wilderness survival.
Quick-Reference Survival Skills Table
| Skill | Time Critical | EDC Tool | Success Rate (US Army data) |
|---|---|---|---|
| Fire Starting | 3 hours | Ferro rod, knife | High with practice |
| Water Purification | 3 days | Knife, paracord | Essential for health |
| Shelter Building | 3 hours | Paracord, knife | Prevents exposure |
| Navigation | Indefinite | Compass, knife | Key for rescue |
| First Aid | Minutes | Knife, paracord | Stops bleeding fast |
| Foraging | 3 weeks | Knife | Supplements calories |
| Signaling | Hours | Mirror, whistle | Alerts rescuers |
Priority Checklist for Bug-Out Scenarios
Grab your 72-hour kit or go-bag first. Check weather and terrain for risks like floods or avalanches.
- Assess immediate threats. Use situational awareness to spot dangers like wildlife or incoming storms.
- Build shelter and fire. Protect from elements with a debris hut or lean-to using paracord.
- Secure water source. Boil or filter from streams to avoid waterborne illness.
- Signal for help. Follow the three blasts rule with a whistle or smoke signals.
- Treat injuries. Apply first aid like wound care or splinting before foraging.
- Plan movement. Use compass and map reading if needed, or stay put for rescue.
- Maintain mental resilience. Control panic with deep breaths and focus on one task at a time.
This checklist follows the priority of survival: air, shelter, fire, water. Use for city survival or off-grid living as needed.
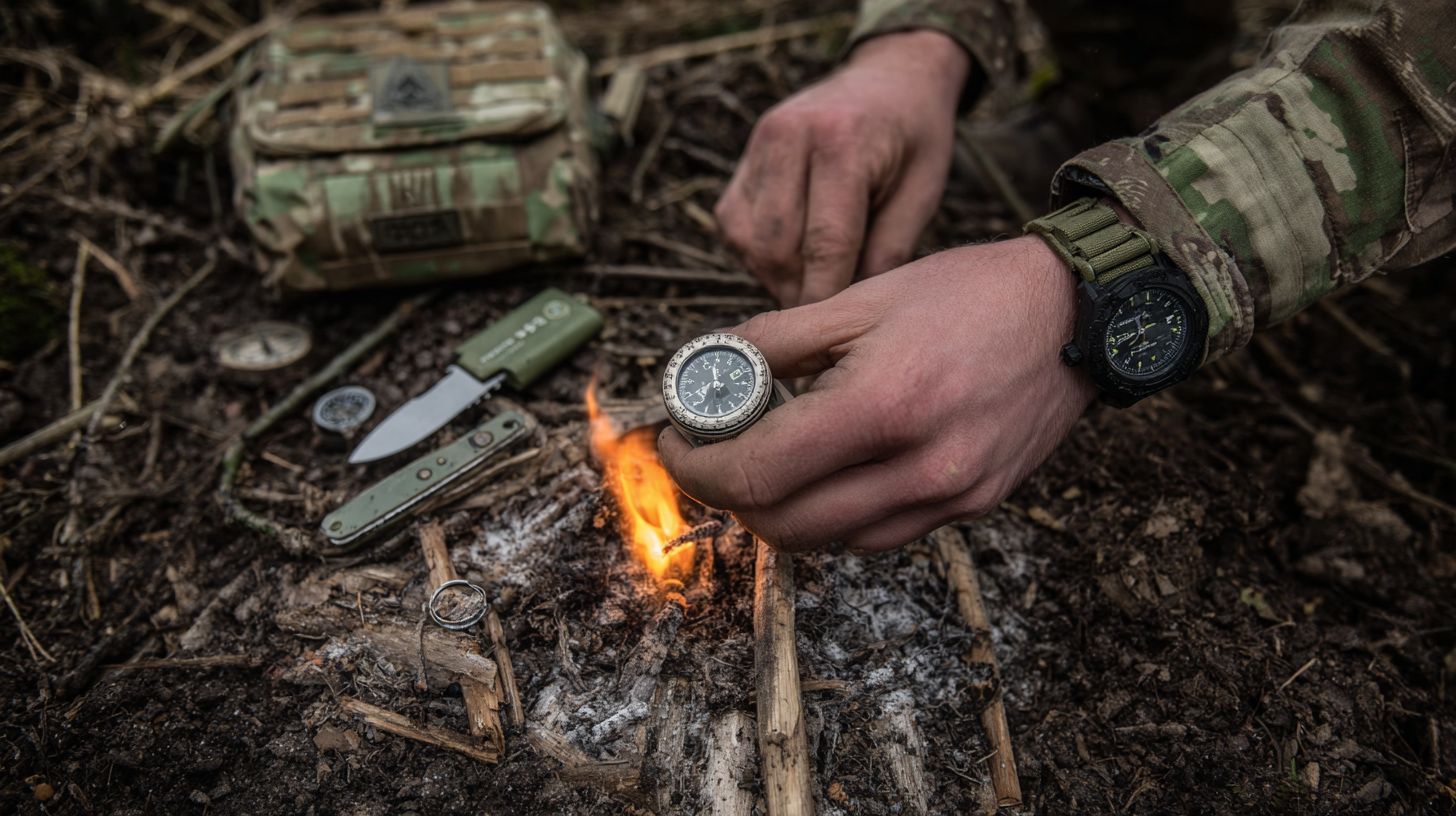
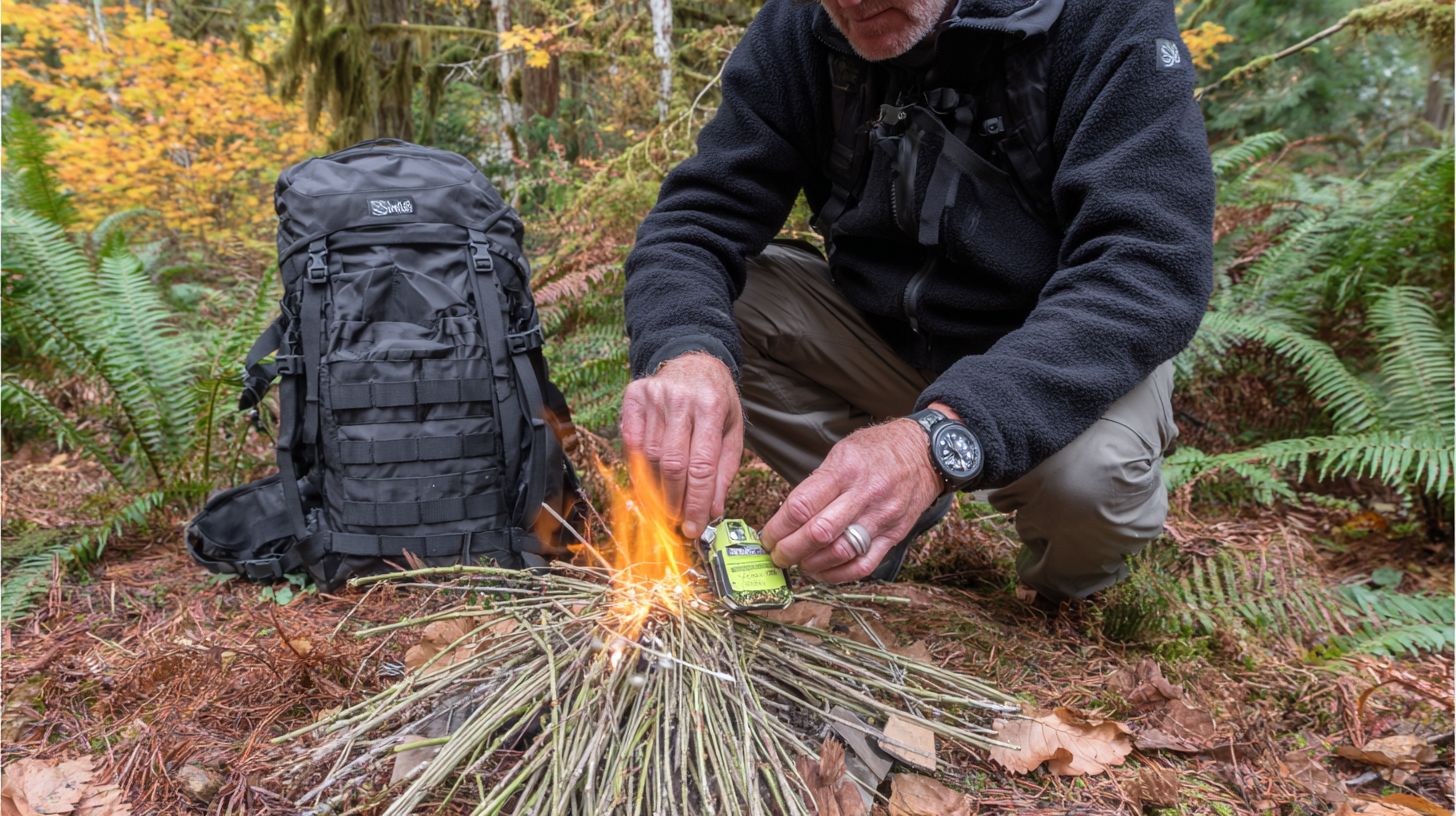
Build a Fire
Starting a fire with a ferro rod and char cloth takes under 2 minutes. Here’s your step-by-step using everyday materials. This essential survival skill keeps you warm, cooks food, and signals for help in wilderness survival.
Practice fire starting often to build confidence for emergency preparedness. You need tinder, kindling, and fuelwood in that order. Poor fire skills can lead to cold nights or failed water purification.
Carry EDC essentials like a ferro rod in your bug out bag. Pair it with fatwood for wet weather reliability. Fire is part of the rule of threes: you can survive three hours without shelter or fire in harsh conditions.
Master these basics alongside shelter building and water sourcing. A good fire boosts mental resilience and situational awareness. Always prioritize safety to avoid burns or wildfires.
Best Firestarters Ranked by Reliability
| Firestarter | Cost | Key Features | Best For |
|---|---|---|---|
| Ferro Rod | $15 | 12K strikes | Wet weather king |
| Bic Lighter | Free | 3K lights | Fails when wet |
| Bow Drill | Free | 20min skill | Needs dry wood |
| Ferro + Fatwood | $25 combo | Unlimited | All conditions |
| Magnifying Glass | Free | Sunny only | Clear days |
Ferro rods top the list for fire starting in tough spots. They work when wet and last through thousands of uses. Keep one in your multi-tool kit for SHTF skills.
Bic lighters are handy but useless in rain. Bow drills build bushcraft know-how with no gear needed. Just find dry wood and practice the motion.
The ferro + fatwood combo handles any weather reliably. Magnifying glass is free if you have sunglasses. Test each in your backyard for disaster survival prep.
Step-by-Step Fire Building Sequence
- Make a tinder bundle with dry grass and char cloth. Keep it fist-sized for quick ignition.
- Build a kindling teepee using pencil-thick sticks. Use about 20 pieces around your tinder.
- Add a fuelwood log that’s wrist-thick once kindling catches.
- Light it with 3-5 ferro strikes at a 30 degrees angle into the tinder.
Follow this sequence for fast results in outdoor survival. Start small to avoid smothering the flame. Blow gently to feed oxygen if needed.
Char cloth catches easiest from battery fluff or cotton balls waxed up. Pencil-thick kindling snaps easily and burns hot. Wrist-thick fuel sustains through the night.
This method pairs well with debris hut shelters. Practice with knife skills to prep materials. It works for boiling water or signaling too.
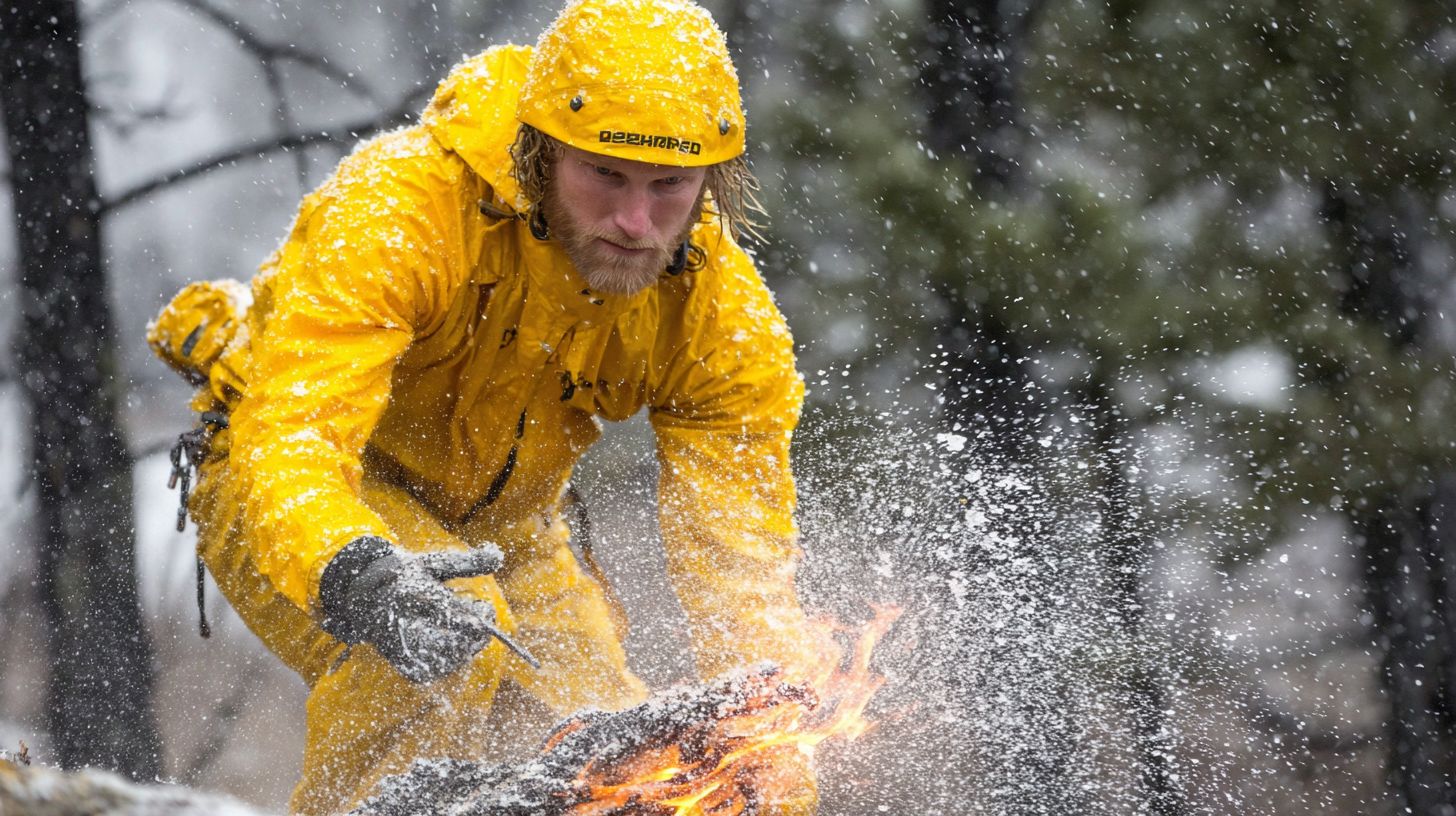
Wet Weather Fire Techniques
Grab birch bark’s inner layer for wet weather fire. Peel it back and shave into fluffy strips that burn even soaked. Fatwood shavings from pine stumps ignite reliably too.
Use the rock boiling method if direct fire fails. Heat rocks in your fire, then drop into a water-filled container. This purifies water without a pot.
The US Army FM 3-05.70 Survival Manual covers these tricks for real emergencies. Scrape fatwood with your knife for tinder that resists dampness. Combine with ferro rod for best odds.
Practice in rain to master wilderness survival. Inner bark holds natural oils that repel water. These skills save lives during floods or storms.
Purify Water

Purify any stream water to safe drinking levels in 10 minutes using your Sawyer Mini filter or boiling method, no special gear needed. In survival situations, water purification ranks high among essential skills right after air and shelter. Dirty water leads to quick illness, so always treat what you find from streams, ponds, or rain.
Pick methods based on your tools and time. Boiling works anywhere with fire, while filters like Sawyer Mini handle giardia and bacteria without heat. Tablets or drops offer portability for your bug out bag or EDC essentials.
Practice these in your backyard to build confidence for wilderness survival or disaster scenarios. Combine with water sourcing from clear-running sources to cut risks. Store purified water in clean containers to stay safe longer.
For long-term off-grid living, set up rainwater collection and treat it daily. This keeps your 72-hour kit ready and teaches resourcefulness in SHTF skills.
Water Purification Methods Comparison
Choose the right method for your survival kit based on cost, time, and what it removes. Filters and boiling tackle most threats like bacteria and protozoa. Always follow instructions to avoid waterborne illness.
| Method | Cost | Capacity/Time | Notes |
|---|---|---|---|
| Boiling | Free | 1 min at rolling boil | Kills bacteria |
| Sawyer Mini | $25 | 100K gallons | Filters giardia |
| Aquatabs | $10/100 tabs | 30 min chlorine | |
| LifeStraw | $20 | 4K liters | Suck method |
| Iodine Drops | $8 | 30 min + shake | Tastes bad |
| Solar Still | Free | 24 hrs, 1 cup/day |
Boiling suits fire starting experts with stainless bottles. Portable options like LifeStraw fit EDC for hiking or urban survival. Test tastes and effectiveness on clear water first.
Solar stills work in deserts for passive collection, pairing with paracord uses for setup. Mix methods for backup in your go-bag.
Step-by-Step Boiling Setup
Boiling stands out as a reliable purification skill with basic fire starting tools. Use a stainless steel bottle or canteen to heat water directly over flames. This method kills pathogens without filters.
- Grab a stainless bottle or canteen.
- Collect three times the water volume in fuel like tinder and kindling.
- Bring to 212 degreesF rolling boil for 1 minute at sea level.
- Cool for 30 minutes before drinking.
Adjust boil time higher in mountains due to lower boiling points. Practice with bow drill or ferro rod for wet weather fire scenarios. This builds confidence in bushcraft and emergency preparedness.
Rock boiling works without metal containers, using hot stones in wood or hide. Pair with debris hut shelter for full wilderness survival setup.
How Much Water You Really Need
Plan for 1 gallon per person per day in survival mode, covering drinking, cooking, and basic hygiene. Hot weather or hard work doubles that amount quickly. Ration wisely to avoid dehydration.
Dehydration hits fast without enough intake. Early signs include dry mouth and dark urine, worsening to dizziness. At severe levels, confusion sets in, making other skills like navigation or self-defense tough.
Experts recommend sipping small amounts often over gulping. Store extra in your survival manual-inspired kit with purification tablets ready. Watch group members for symptoms during long hikes or disaster survival.
Build mental resilience by prioritizing water in the rule of threes: air, shelter, fire, water. Practice with 72-hour drills to match intake to activity, ensuring adaptability in any terrain.
Find Shelter
Build a debris hut shelter from leaves and branches in 45 minutes that retains most body heat overnight. This essential survival skill keeps you off the cold ground and blocks wind or rain in the wilderness. Practice it now for emergency preparedness.
Shelter ranks high in the rule of threes: you can survive three hours without it in harsh conditions. Poor choices lead to hypothermia treatment needs or worse. Pick the right type based on your spot.
Start by assessing terrain awareness and weather prediction. Avoid low spots for flood survival or avalanche awareness. Use natural materials close by to save energy for fire starting or water purification.
Combine shelter building with signaling like the three blasts rule. A solid shelter lets you focus on food foraging or navigation next. Test your setup before dark hits.
5 Essential Shelter Types by Environment
Match your shelter building to the area for best protection in outdoor survival. Each type uses local stuff like sticks, tarps, or snow. Build fast to beat changing weather.
| Shelter Type | Best Environment | Build Time | Key Features |
|---|---|---|---|
| Debris Hut | Forest | 2 hours | 4-6 inches leaf insulation, entrance tunnel |
| Lean-To | Windy areas | 30 minutes | Reflector for fire, open side |
| A-Frame | Rainforest | Quick with tarp | Tarp over sticks, steep pitch |
| Snow Cave | Arctic | Varies | 2-foot ice wall, ventilation hole |
| Tarp Hammock | Buggy areas | 15 minutes | Hung high, bug net option |
A debris hut is a stick frame covered with a pile of leaves, like a giant nest. The lean-to looks like a slanted wall of branches facing a fire. An A-frame rises like a tent peak with runoff sides.
Snow caves scoop into drifts with a low entrance to trap warmth. Tarp hammocks swing between trees, away from crawlers. Use these for disaster survival or SHTF skills.
Construction Steps for Debris Hut
The debris hut works great in woods for bushcraft basics. Find two trees close together. Use nearby branches and leaves to stay efficient.
- Prop a ridgepole six feet high between trees as the spine.
- Add eight-foot ribs every two feet along the ridgepole, sloping to the ground.
- Pile on a two-foot layer of debris like sticks and leaves for the walls.
- Pack one foot of leaves inside for insulation against the ground.
- Dig or build a six-foot entrance tunnel to block wind and critters.
Crawl in feet first to keep your head by fresh air. Light a small fire outside for extra heat. This setup ties into priority of survival after air.
Reinforce with more leaves if rain threatens. Pair it with knot tying for secure poles. Practice in your yard to nail wilderness survival.
Common Shelter Mistakes
Many skip ground insulation and pay for it later. Experts recommend an 18-inch leaf bed minimum to fight cold. Thin layers let chill creep up fast.
A 2019 wilderness SAR report noted most hypothermia cases tied to poor setups. Wet spots or bare earth worsen it quick. Always clear rocks and raise your bed.
Forget ventilation and you risk bad air buildup. Block entrances too tight, and moisture traps inside. Check for drafts that pull in bugs or predators.
Build too big and heat escapes. Size it for one person to save body warmth. Find these errors in practice drills to improve your prepper skills.
Navigate Without GPS
Find true north within 2 degrees accuracy using just a wristwatch and shadow-stick method. No compass required. These essential survival skills keep you on track in wilderness survival when tech fails.
Practice these methods often for emergency preparedness. They work in most outdoor survival spots. Pair them with map reading for best results.
In SHTF skills or bug out bag scenarios, knowing navigation basics beats relying on batteries. Test them on hikes first. Build confidence step by step.
Combine with terrain awareness and weather prediction. Spot cloud patterns early. Stay ahead of storms using wind direction clues.
Navigation Methods Ranked by Conditions
Pick the right method based on time of day and weather. Each shines in specific setups for wilderness survival. Always have backups ready.
| Method | Best Conditions | Notes |
|---|---|---|
| Wristwatch Method | Daytime, within +-5 degrees of true solar time, sunny | Analog watch points hour hand at sun, bisect to north |
| Shadow Stick | Morning shadow for north, works daily | Simple stick marks true north line |
| Star Navigation | Clear night, Polaris within 1 degrees error in north | Use Big Dipper to find pole star |
| Compass + Map | All weather, adjust 1 degrees for magnetic declination | Most reliable with topo map |
| GPS Backup | Any, like Suunto MC-2 around $60 | Last resort, carry spare batteries |
Start with shadow stick on clear days. Move to stars at night. Compass plus map handles rain best in disaster survival.
Experts recommend practicing in familiar areas. Adjust for your location’s declination. This builds survival mindset and resourcefulness.
Shadow Stick Navigation Steps
This easy trick finds north anywhere sunny. Grab a straight 3-foot stick around 9 AM. Perfect for bushcraft or off-grid living.
- Place the stick upright in soft ground.
- Mark the tip of its shadow with a rock or scratch.
- Wait 15 minutes, mark the new shadow tip.
- Bisect the line between marks. That points true north.
Recheck every hour as sun moves. Works great for shelter building or fire starting alignment. Practice on weekend trips.
In long-term survival, use it with water sourcing plans. Face north to read terrain better. Ties into priority of survival rules.
Triangulation with Natural Landmarks
Spot your position using 2-3 hilltops or peaks. Pace out 1000 steps between views. Plot lines on a 1:24K USGS topo map.
First, pick distant landmarks. Sight them from your spot, draw bearings. Where lines cross is your location in outdoor survival.
Use this with compass use for accuracy. Great for evasion tactics or predator avoidance. Check the USMC Navigation Manual for details.
Pace consistently, count steps. Adjust for uphill slopes. Pairs well with signaling like mirror flashes to rescuers.
First Aid Basics
Stop life-threatening bleeding with a proper tourniquet in 30 seconds using your belt and multi-tool. This simple move can save a life in wilderness survival. Practice it now so it becomes second nature during emergencies.
In the outdoors, injuries happen fast, from falls to animal encounters. Knowing first aid basics buys you time until help arrives. Focus on the biggest threats first, like heavy blood loss or shock.
Build your emergency preparedness with an IFAK, or individual first aid kit. Keep it in your bug out bag or EDC essentials. Regular checks keep everything ready for disasters.
Combine these skills with others like shelter building and water purification. They form the core of essential survival skills. Stay calm, assess the scene, and act with purpose.
Top 5 Wilderness Injuries Treatment Priority
| Injury | Treatment Priority |
|---|---|
| Arterial Bleed | Tourniquet high and wide, like CATgen4 style for $30 |
| Broken Bones | SAM splint for $15, apply 3-point pressure |
| Hypothermia | Vapor barrier bags, keep dry in 40-50F conditions |
| Snake Bite | Immobilize limb, no sucking venom, note 25% are venomous in US |
| Burns | Cool with water, cover loosely, watch for infection |
Prioritize these wilderness injuries based on speed of danger. Arterial bleeds kill quickest, so handle them first. Use whatever you have on hand if gear is missing.
For broken bones, stabilize to ease pain and prevent more damage. Hypothermia sneaks up in wet, cold weather, so insulate fast. Snake bites need calm movement to slow venom spread.
Practice this list in your survival training. It matches wilderness medicine protocols. Pair with wound care and splinting for better outcomes in remote spots.
Tourniquet Application Steps
- Place 2-3 inches above the wound, never on joints.
- Tighten until bleeding stops completely.
- Note the time applied on skin or nearby object.
- Check circulation every 2 hours, loosen briefly if needed.
Follow these steps exactly for tourniquet use in trauma. A belt and stick work if you lack a commercial one. This skill fits right into your SHTF skills set.
Train with a multi-tool to twist tight. In group settings, assign one person to monitor time. It prevents complications like nerve damage from overtightening.
Experts recommend practicing on yourself safely. Combine with QuikClot for packed wounds. This keeps you alive long enough for evacuation in bushcraft scenarios.
IFAK Contents Checklist
- Tourniquet for severe bleeding control.
- QuikClot gauze to pack deep wounds.
- Chest seal for punctures that suck air.
- Trauma shears to cut clothing fast.
- SAM splint, bandages, gloves, and pain meds.
Stock your IFAK following wilderness medicine protocols. The CDC says bleeding kills many trauma victims. Tailor it for your outdoor survival needs.
Add items like triangular bandages for slings or improvised stretchers. Check expiration dates often. Include tweezers for splinters or insect bites.
Keep it accessible in your 72-hour kit. Practice unpacking and using contents blindfolded. This builds speed for real first aid under stress.
Forage and Hunt
Identify 5 universal edible plants (cattail, dandelion, clover, pine inner bark, acorns) that provide 500+ calories/day in temperate zones. These essential survival skills keep you going when supplies run low. Knowing them beats starvation in wilderness survival.
Foraging saves energy compared to hunting big game. Practice in your backyard first. Combine with water purification and fire starting for full emergency preparedness.
Hunting and trapping add protein to plant calories. Start small with fish or rabbits. Build these bushcraft skills through hands-on trials.
Always prioritize safety. Test unknowns with care. Pair foraging with shelter building to conserve energy in SHTF scenarios.
Universal Edibles Identification Guide
Cattail grows in wetlands with tall stalks and brown hotdog-like heads. Roots make flour for flatbreads. All parts offer food in a pinch.
Dandelion pops up everywhere with jagged leaves and yellow flowers. Eat all parts raw or boiled to cut bitterness. Roots roast like coffee.
Use this simple 3-part test for any plant: rub on skin and wait for rash, chew a bit and spit if it burns, swallow a small piece and monitor for hours. Experts recommend this to avoid poisonous plants.
| Plant | Edible Parts & Prep | Notes |
|---|---|---|
| Cattail | Root flour | High calorie base |
| Dandelion | All parts, boil bitter parts | Nutrient dense |
| Pine Inner Bark | Scrape and boil | Winter staple |
| Acorns | Leach tannins 3 days | Grind into flour |
| Clover | Leaves and flowers | Raw or cooked |
Simple Fishing/Trapping Methods
A bottle trap works great for streams. Cut the top off a 2L bottle, invert it, add bait like worms. Fish swim in but can’t get out.
For snares, tie paracord in a figure-8 loop at ankle height on game trails. Add a stick anchor. Rabbits trip and tighten it.
- Bottle trap: Invert cut 2L bottle, bait inside.
- Snare loop: Paracord figure-8 on trail.
- Spearfish: Use sharpened stick in shallow pools at dawn.
Check traps daily to avoid spoilage. Combine with knife skills for cleaning catch. These methods fit bug out bag setups.
Calorie Math for Survival
Aim for 2000 calories per day minimum to stay sharp. Foragers who know what they’re doing often get around 1200 on good days. Track intake with rough estimates from portions.
Plants like cattail roots pack dense energy. Mix with trapped game for balance. Research suggests focusing on high-calorie staples first.
Reference basic foraging guides like USDA resources for details. Save energy for tasks like starting a fire or navigation. Conserve by resting more early on.
In long-term survival, permaculture basics help sustain yields. Practice now to build efficiency. Stay hydrated alongside calories for best results.
Signal for Help
Three whistle blasts in the SOS pattern can be heard 1 mile away. Rescue teams train to recognize this universal distress signal. It works well in dense forests or thick brush where visibility stays low.
Signaling ranks high among essential survival skills. You need methods that match your surroundings, like day or night, clear weather or fog. Practice these to increase your readiness for emergencies in wilderness survival situations.
Start with simple tools in your bug out bag or EDC essentials. A whistle beats yelling since it saves energy and carries farther. Combine signals for better odds of getting spotted by aircraft or ground searchers.
Focus on the rule of threes in signaling: three blasts, three fires, three flashes. This pattern grabs attention fast. Keep calm and repeat signals every few minutes without overdoing it.
Signaling Methods by Range/Conditions
Different conditions call for specific signaling techniques. Pick based on distance, time of day, and terrain. These fit into your outdoor survival toolkit alongside fire starting and shelter building.
| Method | Range/Conditions | Key Details |
|---|---|---|
| Mirror Flash | 5+ miles, daytime | 3 flashes signal distress |
| Smoke Signals | 10+ miles, clear day | 3 fires in triangle shape |
| Whistle | 1 mile in forest | 3-3-3 blasts pattern |
| Ground-to-Air | Visible from aircraft | Orange panels, spell F-E-E-T |
Use mirror flash when the sun shines bright. Smoke signals rise high on windless days, perfect for open areas. Whistles cut through woods, while ground panels work from planes overhead.
Layer these for disaster survival. Lay out orange panels from your survival kit, then add smoke. This multi-tool approach increases rescue chances in SHTF skills practice.
Mirror Signaling Technique
A signal mirror costs little and packs small. It reflects sunlight to flash rescuers miles away. Keep one in your EDC essentials with your multi-tool and knife skills gear.
- Hold the mirror in one hand, aim the sun’s reflection at the horizon with your other hand.
- Spot an aircraft or survivor, then flash the reflection toward them sharply.
- Repeat 3 times in a row to indicate distress, pause, then repeat the set.
Practice on sunny days to get the hang of it. Angle matters, so steady your hands. This beats other methods in bright daylight for wilderness survival.
Pair it with whistle signals if planes circle back. No batteries needed, just sun and patience. Experts recommend it for long-range visual alerts in survival training.
International SOS Codes
Morse code offers a no-gear way to signal. The SOS pattern is…—… with 3-second intervals between dots and dashes. Rescue teams worldwide know it from the US Air Force SAR Manual.
Use light flashes, sounds, or even arm waves. Short-short-short, long-long-long, short-short-short spells help clear. Practice slowly until it feels natural for survival mindset.
In low light, tap rocks or whistle it out. Ground patterns with rocks or logs work too. This ties into priority of survival: signal before shelter if rescue seems near.
Combine with smoke or mirror for stronger effect. Mental resilience helps you stay consistent. It’s a core part of prepper skills and bushcraft knowledge.
Looking for a proven solution?
Check out our recommended resource here: Click here to learn more